I love mailart, vintage stuff, and photography. I finally found a way to combine them all!
This is the first set of mailbox mailing labels and envelope seals that I made from a photo of a little tin mailbox. Now I'm working on a set of mailing labels made from some of my vintage ephemera. I can't wait to share those with you too!
These are available in my Etsy shop.
Sunday, November 28, 2010


Sunday, October 24, 2010
My Round Robin Mailart Zine Front
The Round Robin Mailart Zine Project is in full swing. Seven of the ten players have sent their booklets out into the world. This is the "postcard" side of mine that is traveling to TN.
I created the page with a 1920's teacher worksheet, magazine fish, deco tape, stamp selvedges, vintage stamps, inktense pencils, and Caran D'ache watercolor pencils.

I created the page with a 1920's teacher worksheet, magazine fish, deco tape, stamp selvedges, vintage stamps, inktense pencils, and Caran D'ache watercolor pencils.
Sunday, September 19, 2010
Mail Art Round Robin Zine
Hi All, Thanks for coming. I decided to use my blog to host the ZMACS Round Robin Mailart Zine Project so everyone could actually see what my intentions are for the swap. The examples below are the two test pieces that I mailed from Massachusetts to California and The UK. They both made it with no problems so I definitely think this swap is doable. I'm sorry, I loaded the pictures in backwards order (one of these days I'll do it right the first time). :)


I did a collage on one side and used the other side for a note and the address.

To mail the fat postcard I put a piece of packing tape on each of the three open sides.


I took five pages of 110 lb. 8 1/2 x 11 cardstock, folded them in half and sewed them together down the middle.


Saturday, September 18, 2010
Supersecret Mailart Zine Project
I am putting together a round robin mailart zine project on www.swap-bot.com in the "Zines, Mailart, and Other Cool Stuff" (ZMACS) group and this was the first prototype.
The idea is to sew pages together down the middle, fold them in half, tape the booklet shut, and treat it like a fat postcard. The next person cuts the book open, flips open your page and does the same process on a new page.
At the end of the swap, each person will have their own zine of mailart.
This one went from MA to CA with no problems. It is now going to make a stop in MD before coming home to MA.

The idea is to sew pages together down the middle, fold them in half, tape the booklet shut, and treat it like a fat postcard. The next person cuts the book open, flips open your page and does the same process on a new page.
At the end of the swap, each person will have their own zine of mailart.
This one went from MA to CA with no problems. It is now going to make a stop in MD before coming home to MA.
Tuesday, April 20, 2010
Creating Fabric with SuperSolvy
I had promised some Flickr friends that I would post a tutorial for making fabric with SuperSolvy ages ago...I finally did it!
Step one is to cut 2 sheets of SuperSolvy (the dissolvable interfacing available at places like Joann's). I found that about 12" by 12" is a nice manageable size.
 Step Two: Cover one sheet of SS with lots of fabric bits, yarn, lint, wool roving, silk cocoons, and any other little fabricy bits you might have.
 Step Three: Once you have covered your first piece of SS with fabric bits, cover it with the second piece of SS and pin it well.

I'm not sure how this picture got out of order...oh well!

Step Four: Take your sewing machine for a drive!! Sew all over the sandwich making sure to catch all the bits in your stitching.


Step Five: Following the directions on the SuperSolvy package dissolve away the stabilizer. I like to do this in a seperate container so I can dump the water outside. It isn't good to dump your gooey water down the drain.


Keep swishing it around in your warm water until all the sticky stuff is gone.

Step Six: Lay your new fabulous handmade fabric out on a kitchen towel to dry.

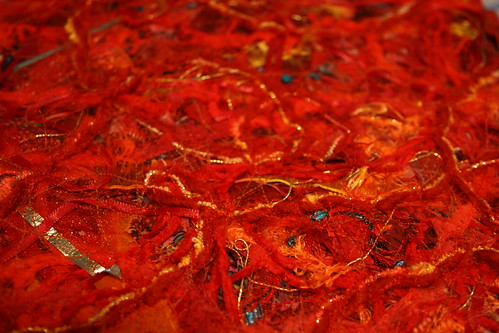
Voila! Once it dries it is ready to be used in any of your wonderful projects. I have used my own fabric to make postcards, ATC's, and a purse.
Step one is to cut 2 sheets of SuperSolvy (the dissolvable interfacing available at places like Joann's). I found that about 12" by 12" is a nice manageable size.
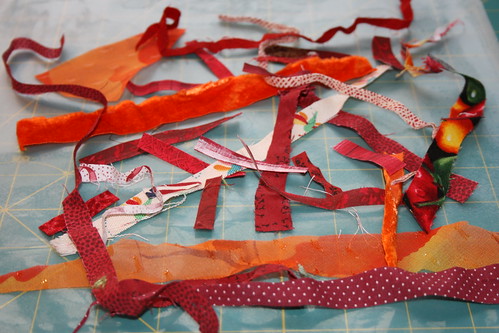 Step Two: Cover one sheet of SS with lots of fabric bits, yarn, lint, wool roving, silk cocoons, and any other little fabricy bits you might have.
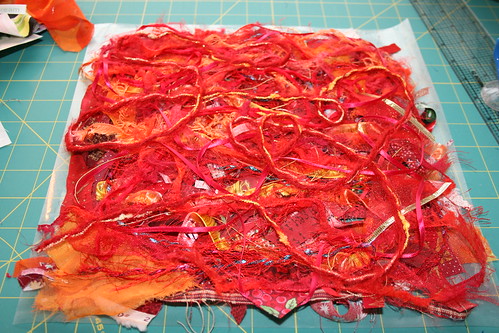 Step Three: Once you have covered your first piece of SS with fabric bits, cover it with the second piece of SS and pin it well.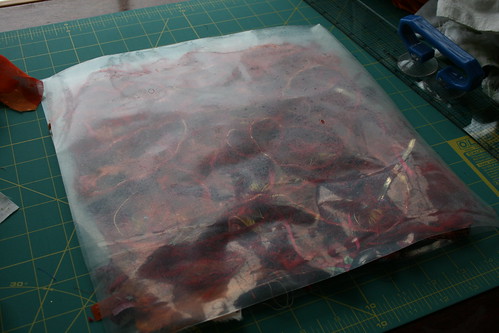
I'm not sure how this picture got out of order...oh well!

Step Four: Take your sewing machine for a drive!! Sew all over the sandwich making sure to catch all the bits in your stitching.

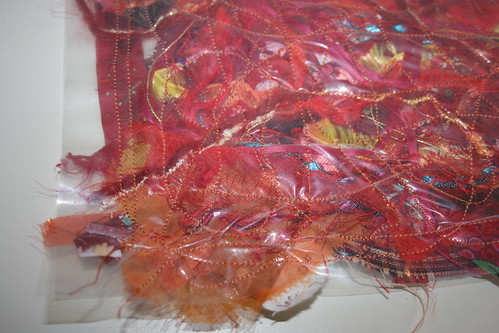
Step Five: Following the directions on the SuperSolvy package dissolve away the stabilizer. I like to do this in a seperate container so I can dump the water outside. It isn't good to dump your gooey water down the drain.

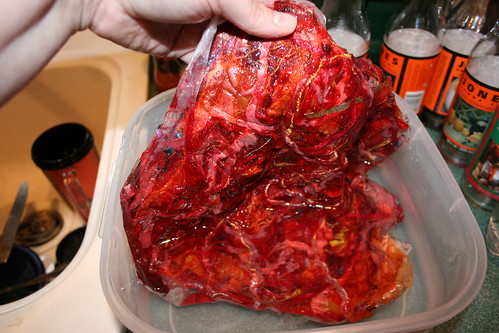
Keep swishing it around in your warm water until all the sticky stuff is gone.
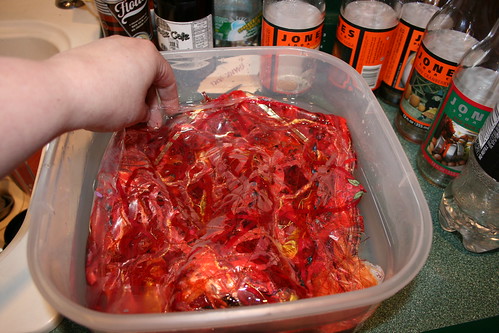
Step Six: Lay your new fabulous handmade fabric out on a kitchen towel to dry.
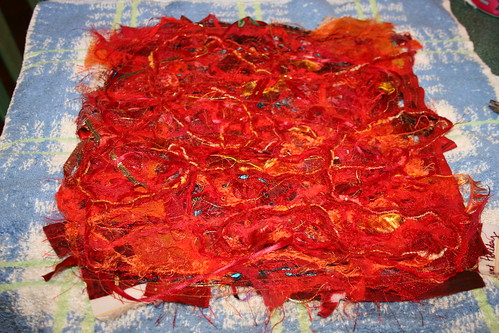
Voila! Once it dries it is ready to be used in any of your wonderful projects. I have used my own fabric to make postcards, ATC's, and a purse.
Have fun!

Thursday, January 15, 2009
Art Journaling
 There are a few moments on a slightly cloudy morning in the frigid winter when we get awesome red color through the trees. Okay, the color wasn't this bright, but it was beautiful and it became this after I played with it. This is looking east from my front porch. The ocean is about a quarter mile as the crow flies.
I bought myself a copy of Somerset Studios latest Art Journaling magazine and I love it.
The one thing I have taken from it already is to use my own pictures. I get lazy and never print out my pictures, but I'm making a concerted effort. The picture above is my fish, colorized and otherwise futzed with with Photo Impact Pro. When I went to print it out on my favorite matte photo paper from Sam's I ran out of some ink so I threw it back through the printer the other way. Then for kicks I printed another pond bottom image over the whole thing. Running out of ink made a neat effect. I pasted that picture in the journal and will add that photo later.
I'm trying to commit to some art every day. So far, so good.
Hmmm..maybe if I committed to more blogging more people than just Sam would read it. :)
Thursday, December 4, 2008
Subway Pinball
This was tucked in the basement of the second antique store in NH. It wasn't in love with it at first, but now that it is cleaned up and works..pretty cool!
Very early in the history of pinball, just after legs were added. The coin slot was missing, but the others we've had from this era were nickel games.

Very early in the history of pinball, just after legs were added. The coin slot was missing, but the others we've had from this era were nickel games.
Subscribe to:
Posts (Atom)